'TRAKing Pat' covers two ways to cut Left Hand OD Threads on a ProtoTRAK SLX Lathe. If you only have a standard right hand threading tool, you can still make left hand OD threads with these 2 simple methods.
Hello Everyone, I'm TRAKing Pat and today's video is going to cover how to make left-handed threads in a ProtoTRAK SX Lathe.
If you look at the part I have in my hand right now, this is a standard right threading tool and you'll notice that the offset is on this side for the way that it works. And if you're like most shops you don't have a tool to do left-handed threads in our type of a product and if you did, the threading end would be here instead of here. So I'm going to teach you how to move the tool around different ways, run the machine in reverse, and be able to cut that left-handed thread.
The first thing that we're going to talk about is how it would normally be in a standard operation, right? So here is my normal tool holder and my threading tool would be in here, like so, and I would cut from the front side moving towards the headstock. What we're gonna have to do in one of the operations is we're gonna take the tool and flip it to the opposite side, like so, and when I lock it in we're gonna cut from the back side and run the machine in reverse. But before I do that I'm going to show you another method, okay?
So because there's more than one ways to skin a cat, what we're gonna do in this case is I'm going to take my standard tool and turn it upside down. In order to get it at the right height for the center, what i did is I shimmed it underneath and then put the adjustment all the way up to the top so that I'm on the center of the part, like so. Other than that, it's going to be the same way as if I cut a right-handed thread, only I'm gonna run the machine in reverse.
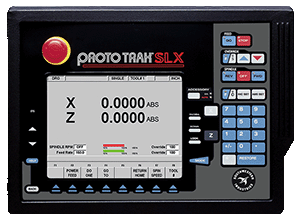
So the first thing that I have to do is I have to make my program, right? And a threading program is pretty simple. Most you probably already know how to do standard threads. So I'm in my PROG mode right here and I'm going to GO TO BEGIN and I'm gonna select THREAD, right? And so if any of this is new to you guys you'll learn it now and if it isn't bear with me for a second. So I'm cutting a 1-inch diameter thread, so I'm gonna put 1 in the beginning. I'm gonna start at Z zero. It's a standard thread, so therefore it's gonna be 1 inch at the other end. The length of my thread is going to be -1.7 inches, and now I come to the pitch. This is usually the thing that gets people because they think that the Pitch is how many threads per inch. In reality, it's the decimal equivalent to that.
So the best way to do that is to figure out by taking 1 and dividing it by how many threads there are per inch. What I'm gonna do is use the HELP key in this case and go to G which is the Calculator on the control and I'm just going to punch in 1 divided by 12 equals and you see the decimal answer there, 0.083333. I'm going to hit BACK to get out of the calculator and I'm just going to put that answer in here 0.08333, Hit the ABS SET button. It's asking me how many Passes I want to use. I'm going to use 8 roughing passes. I'm going to use 1 Spring Pass at the final. I'm going to use the standard Plunge rate of 29-½°, so just hit ABS SET. It's asking me here if I want to do inside or outside threads. This is an outside thread, so 2 for Outside. How many Starts I want to have? It's a single lead thread, so 1. It's asking me for an RPM I'm just gonna run this at 300 and I'm gonna use Tool # 1. Okay? If I look at it by pushing the LOOK button all you're gonna see is the center line and a thread, okay? So far so good. Now I'm gonna hit the MODE key and I'm going to do the TOOL SETUP, okay?
I've actually already done this but I want you to see what it looks like so I'm going to go to TOOL SETUP, I'm going to select Tool #1, and I'm just going to go to EDIT here. And so what I did when I set this up is I touched my tool off to a 1-inch diameter and punched 1 inch in there, touched it off the end of the part, told it I was at Z zero. That's all I have to do to set the tool up. Okay, so I'm gonna get out of there (RETURN) and the next thing I'm gonna do is actually come in and test the part, alright? So here I'm going to hit the MODE key again and I'm gonna go to the RUN mode and in the RUN mode it's telling me, "hey do you want to start at the beginning? or do you want to start somewhere else?" Well, in our case, we only have one event to work with so I'm just going to push START and then I'm going to push GO, and it's gonna go to a home position. It's gonna remind me to put in Tool #1, start the spindle, and GO, right?
So this is where I'm using my upside-down tool and I'm gonna cut it from the front side. So I'm gonna put my first tool in and lock it in place, alright? I'm going to push reverse (REV) so that it can cut left-handed because the tool is upside down and then like always I like to use TRAKing® to make sure I'm doing this in the right place, okay? So I'm going to come in here and I'm just going to TRAK it in with my Z Handwheel, make sure I look like I'm going in the right place. And if you don't know this when you're doing a thread and TRAKing, it'll TRAK all the way up to the beginning and then it's gonna take over to cut that thread, move out at the end of it, and then it'll let you go back to TRAKing. So I'm gonna bring it in here close and let it do the first part. Right there you see it takes over. And since the first cut looks good I know the rest are gonna be good also so I'm going to hit STOP, go to CNC RUN, push GO and let it continue to cut the thread.
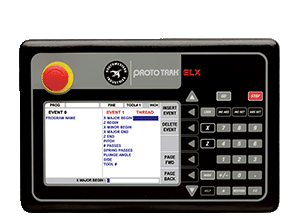
Okay, so now what we're going to do is I'm going to show you how to cut the left-handed thread from the backside of the part. So you'll see in my hand now I have the tool in the holder right side up but facing towards me, okay? And I'm going to use that this time to do that. The process is basically the same, okay? So the first thing I'm going to do is I'm going to go into the PROG IN/OUT mode and I'm going to OPEN the other tool or the other part, okay? So I'm going to move down here, OPEN FILE and you will notice if you want to look at it that the thread is on the opposite side of the line now, right? You'll also notice that I have a position move in here. That's just to make sure that as I come from home to the part that I don't hit the part on the way in or the way out. What I changed in the program, I'll show you right here from the beginning. So I've got a position move that's moving to a negative inch and a half, and then I'm going to stay an inch away from the part and tell it to continue to the thread.
Next page shows me the thread and the only difference in this thread from the first one that I did, is I'm using a negative value in the diameter at both the beginning and the end of the thread so it knows to cut on that side, okay? The last thing I do is tell it to position back to that point so it clears the part when it goes home, okay? The same thing is kind of going to be true in the way that I set up the tool. So I'm going to move over to the SET-UP mode, go back to TOOL SETUP. I'm going to pull up Tool #2 and hit EDIT like I did with the first tool and you'll notice in here that I've got a negative value in here too. So even though the picture on the screen shows that the tool is over here, in reality, I know it's over here, okay?
So I touched it off the back, gave it the 1-inch diameter in the negative side, other than that the tool setup is exactly the same, okay? So now we're gonna run that. So I'm gonna hit the MODE key here and you go back to RUN, go back to START, push GO for it to go home, okay? It's going to move over towards the backside now, right? It's reminding me to start to spindle and make sure that this is Tool #2. So I'm gonna put the machine in REV again and I'm going to use TRAKing to make sure I did this right. I always like to use TRAKing, it makes me feel a lot better. At that point, just like before, it takes over but you see it's cutting on the backside. I know it looks good so I'm going to hit STOP, CNC RUN, and GO. And let it continue to cut the entire thread from the backside. and while you're watching that video you can actually see that it moved away from the thread before it came to the home position so that the tool would clear from the backside.
Okay, now when I look at my thread it looks pretty good but you can actually see that it's not deep enough. That's a very common thing that happens when you're cutting with a pointed tool in a thread. The reason why is the ProtoTRAK has a simple language and if I'm not using the custom thread that allows me to tell it what I want my minor diameter to be, it automatically calculates it from the pitch of the thread and the major diameter. So in this case, it's trying to get to the apex of the radius that should be in the bottom of the thread and therefore it comes up too shallow. So what I'm gonna do here is I'm gonna hit the MODE key and go back to the SET-UP mode, I'm gonna select a TOOL TABLE and I'm going to come down one (DATA DOWN) to Tool #2 and over to the right (DATA RIGHT) and I'm going to put a modifier in here to make it cut deeper. Now remember, I'm on the back side of the tool now, right? So that means instead of moving negative to make it cut deeper I actually have to move positive, okay? So I'm going to put 15 thousandths in here, okay? That'll allow me to cut it a little bit deeper. I'm gonna hit the MODE key, I'm gonna go back to the RUN mode, okay? You're gonna go back to START, push GO and when it tells me to start the spindle again I got to remember put the spindle in REV, okay?
And I know it's going to do the right thing this time so I'm just going to push GO. Here you'll see that it's actually cutting material with every pass because the 8 passes that I put in the threading program, because of the 29-½° angle, it is actually removing that .015 in every single pass of the thread. And there you go. The thread looks much better, it's completed. I hope that this is helpful information for you and that it really helps you when the next time comes that you have to do it. If you don't have the right left-handed tool, tip it upside down, cut it from the front, put it on the back, use it right side up, and get the job done and move on to the next task.
The last thing I want to remind you is that whenever you're using a ProtoTRAK it should be a fun thing to do. So enjoy what you're doing, make neat parts, make lots of money, and remember... Always, Keep on TRAKing! I'm Pat from TRAK Machine Tools. Thanks for watching!